Showing posts with label Baking. Show all posts

Tuesday, 6 September 2016

Malteser Chocolate Cake Recipe


Ok, so if you have been reading my blog since the very beginning you will know that one of my first recipes was a chocolate cake! Well since then I have been using the Tanya Burr Sunday Cake recipe in order to make my chocolate cakes, and all I have to say is that it is absolutely gorgeous!

And to make it even better I have added my own semi twist by adding chocolate chips and Maltese's to it!


Let's Do This!

Prep Time; 10 minutes                               Difficultly; Easy Peasy!

Cook Time; 18- 20 minutes


You Will Need!

170g Butter. Softened
170g Cater Sugar
3 Eggs
140g Self- Raising Flour, sifted
30g Cocoa Powder
1 1/2 teaspoons Baking Powder

For the Butter Icing;

90g Butter, Softened
170g Icing Sugar
Cocoa Powder To Taste!

Maltesers and Chocolate Chips To Decorate!
Feel free to go crazy on the decorations!


First, pre heat the oven to 180 and line two 2 x 21 round loose bottom cake tins.

Next, Cream the butter and sugar until creamy and much paler in colour!

Add the eggs and combine, then add the sifter flour, cocoa powder and baking paper and mix well together!

Divide the batter into the two cake tines, the cake batter may look shallow but it will rise into two beautiful cakes! You will then want to place the cakes into the oven for 18- 20 minutes!

Allow to cool and prepare the icing!

For the icing you will need to cream the butter, so that it is smooth and creamy, then add the icing sugar and mix until fully incorporated!

When the cake it cool, and it must be fully cool, you can now spread the icing on the two sponges and then sandwich together! 

Now spread icing all over the sides and the top of the cake, and now you can decorate it with your favourite sweets!


Follow

Monday, 22 August 2016

Low Fat Banana Bread


Ok, so if you have been reading my blog since the very, very beginning then you will know that my first ever post was a low fat banana loaf. And if you have read the title of this post then you are probably thinking why on Earth, I'am blogging about the exact same thing. 

Well if you have been reading my blog since the beginning then I think it is fair to say, that I have progressed in my photography skills. And so because I feel that I have improved with my blogging ability, I thought that I would again share with you all my low fat banana recipe again. But instead, I also get the idea out that you can also toast this loaf aswell. However, depending what you put on it, it may add to the fat content, and may add a few calories, which if you were me, I would end up loading each slice with a large amount of Lurpack butter. I know healthy right! haha.


                 Difficultly; Easy Peasy                                       Prep Time; 10 minutes

                Cook Time; 40-50 minutes


Let's Do This!

You Will Need;

200g Self- Raising Flour
140g Caster Sugar 
1 1/4 teaspoon Baking Powder 
1/2 teaspoon Ground Cinnamon
2 Egg Whites
3 Bananas (Mashed)
1 Tablespoon Of Golden Syrup for extra sweetness (this is optional)


In Order To Make The Banana Loaf You Will Need To;

 First, Preheat your oven to 180°. And then grease and line your 20x10 cm (8x4in) loaf tin

 Secondly, In a large bowl combine the self raising flour, sugar, baking powder and the ground cinnamon.
Add in the mashed banana and egg whites and combine.

Lastly, pour the mixture into a loaf tin and place in the oven for 40- 50 minutes.

And that's it! Once cooled you can then if you want to toast each slice for an extra crunch!

Follow

Sunday, 7 August 2016

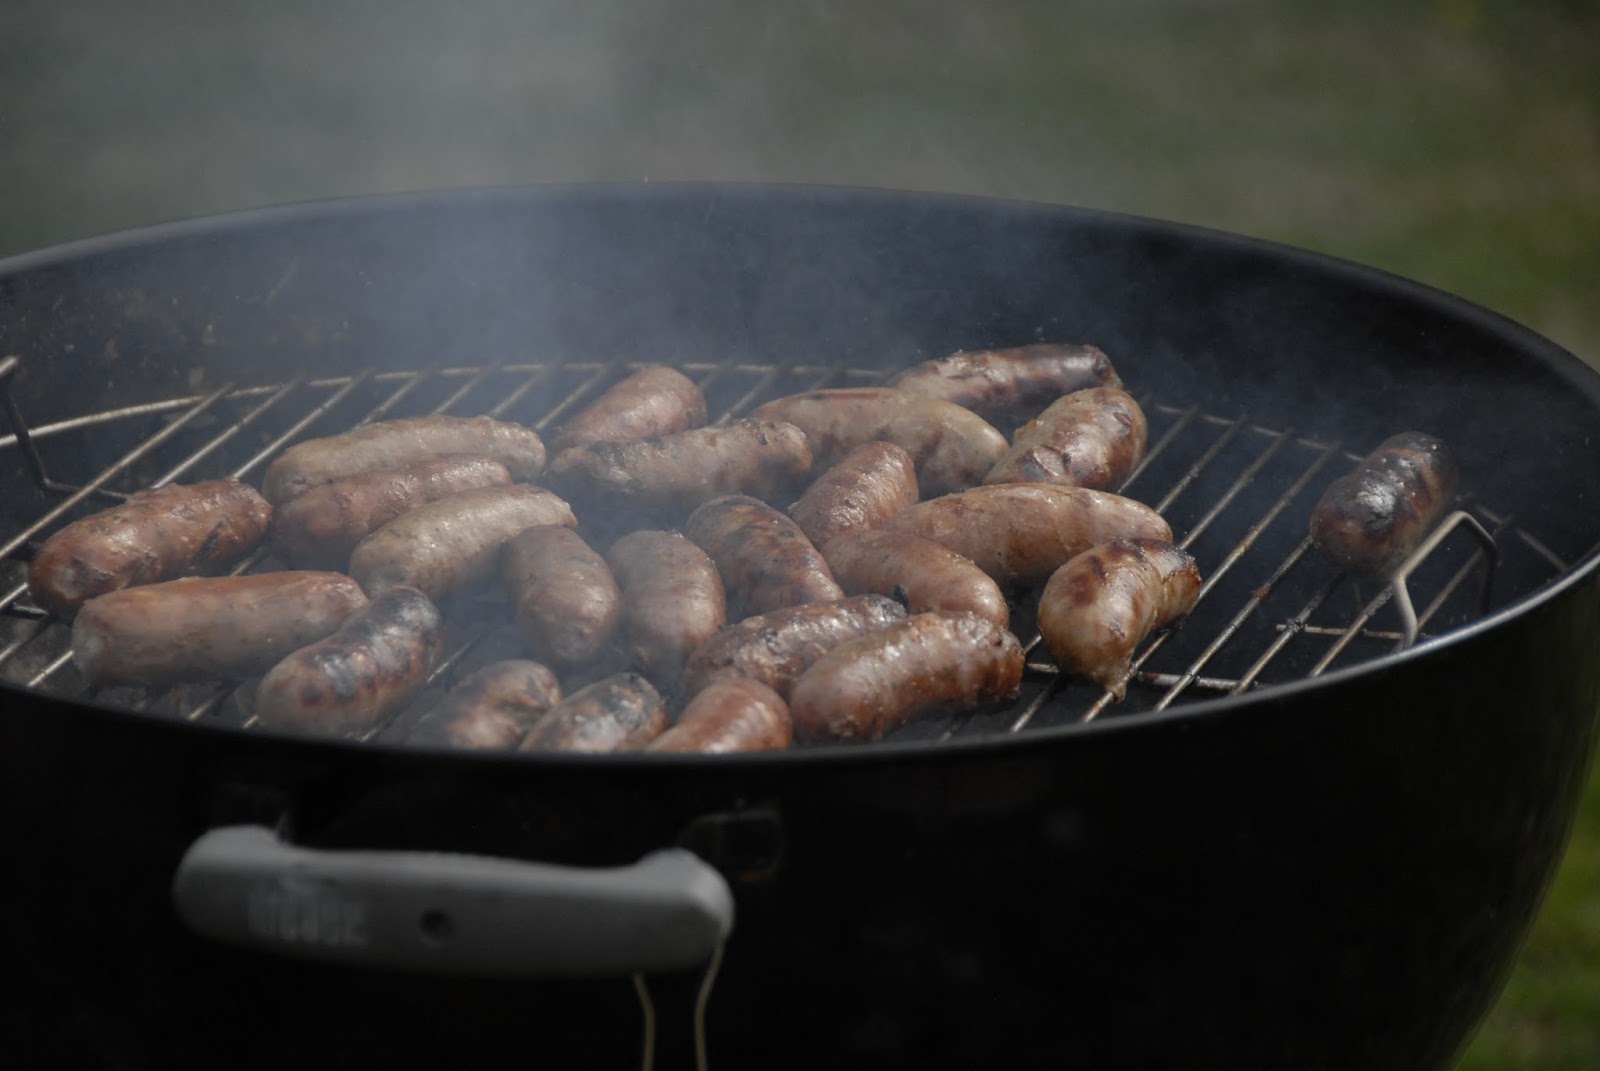
How To Have The Most Perfect BBQ Ever


So, if you know me then you will know that I love a good BBQ. And I know what your think, Ruby didn't you post about having a BBQ last week? 
Yes, you are correct! As soon as it gets to summer, the one thing that I look forward to is having BBQ'S!
I just love the smell and the warmth feeling that a BBQ gives! I feel that it makes everyone happy, and much more relaxed!

So, today I thought I would share on how to have the most EPIC BBQ ever! 

Ok, so apart from a BBQ itself. You also need food. Duh! You can go as big as you want, or you can go as small as you want! Either way, you know that your BBQ will be amazing! You can have chicken, sausages, burgers, pasta. But if you do't eat meat you are also able to find alternatives!

Next, your gonna need people. You don't want to enjoy a massive feast all by yourself! Since again, like lasts weeks BBQ, today is indeed a Sunday! So, that means no everyone will be working! And since the weather is amazing at the moment, you know you can count on a bright sunny day!

As well as this, you will also need a fancy set up! You are gonna need some beautiful place mats, and some amazing dinner plates, and serving dishes to present your fabulous creations! You are also going to need an amazing table cloth. The table cloth you see above is from Tiger, and it is absolutely amazing!

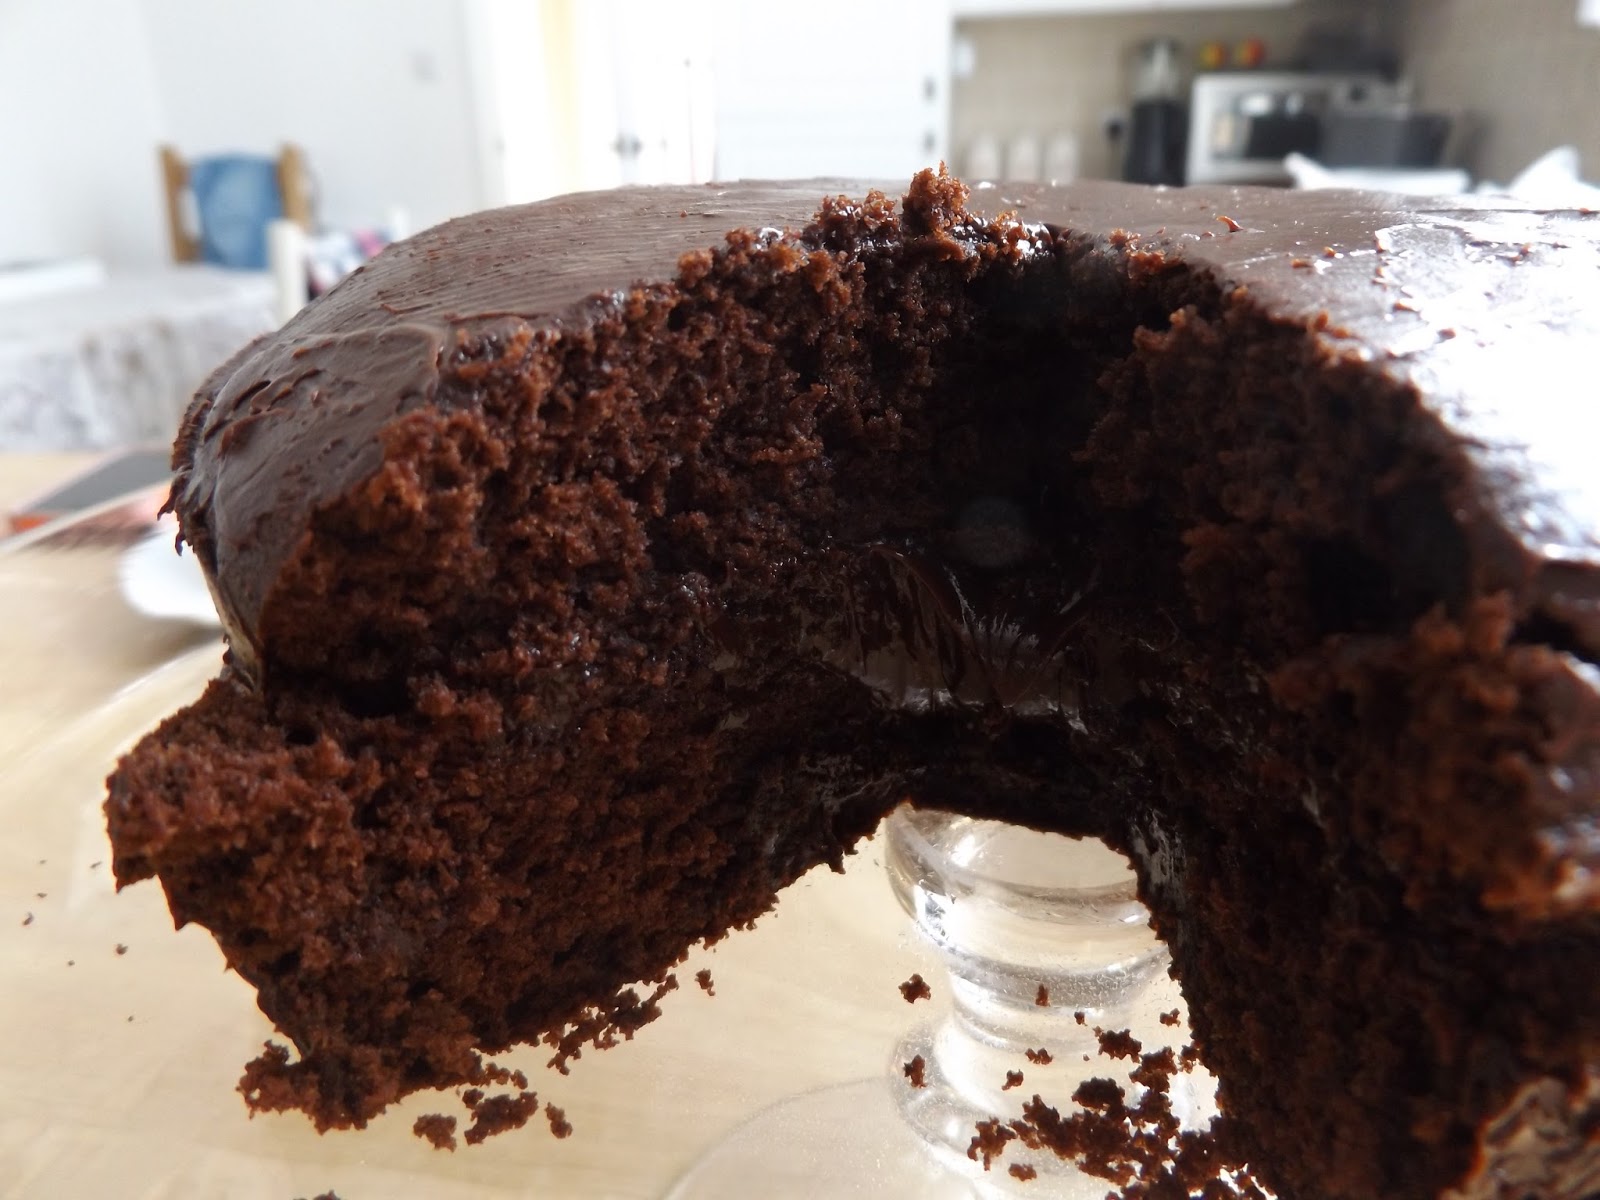
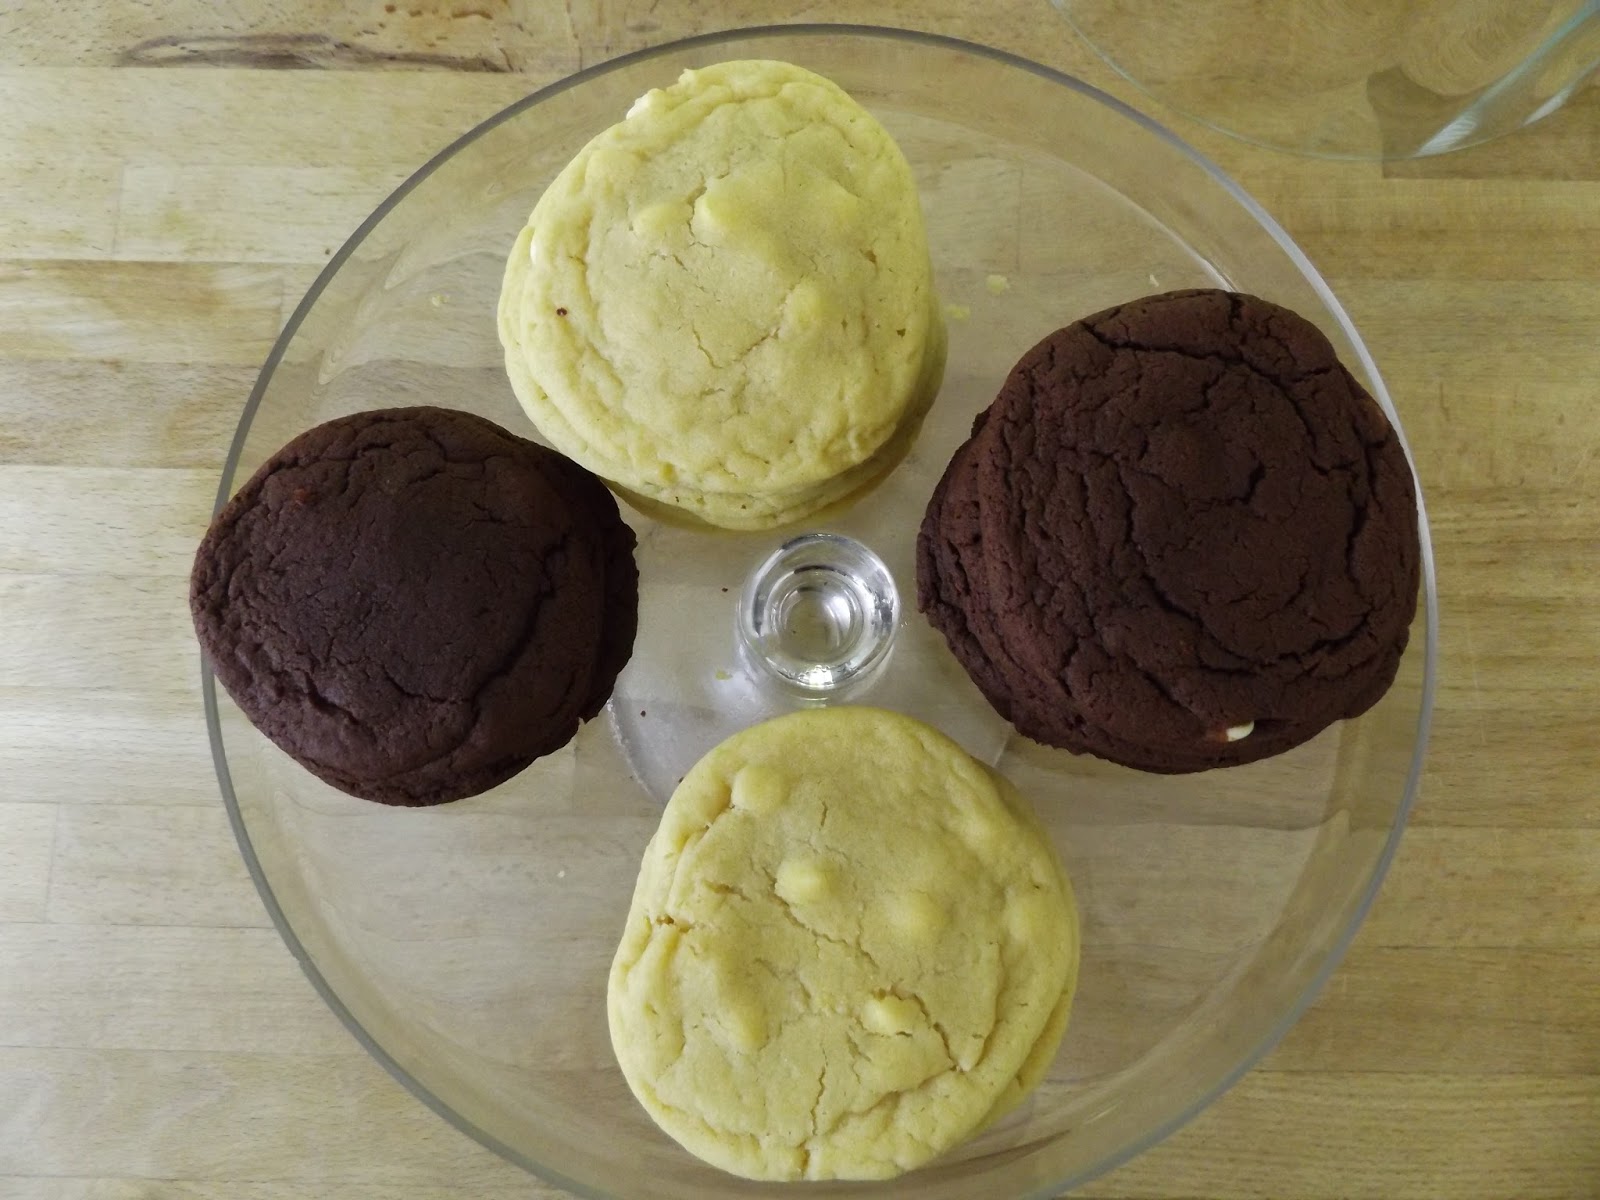
And lastly, dessert! You are going to need dessert! Dessert is the best thing ever, and is the best way to finish of a meal. Especially, if it is a BBQ! As you can see above, I have created my beautiful, and amazing chocolate cake, and the amazing Tanya Burr Chocolate Cookies. 


Follow

Sunday, 10 July 2016

Chocoholic Lovers, Double Chocolate Loaf


So, since today is Sunday and everyone is at home (and also because it's raining!)  I thought that I would create a, "Double Chocolate Loaf!" I have done many of these chocolate loafs before, and every time I make one it gets devoured within minutes of it getting out of the oven. So I thought that I would share it with you, if you are wanting to create something that is super easy, but at the same time already know that it is going to be a massive hit with anyone that is present during the time of it's creation!

LET'S GET TO THE CAKE!

Prep Time; 10 Minutes                                                 Serves; 8- 10 Slices
Cook Time;  40- 50 Minutes                                        Difficulty; Easy Peasy

Let's Do It!

You Will Need;

175g Butter (I use Margarine!)
175g Caster Sugar
3 Eggs
140g Self- Raising Flour
1/2 teaspoon Baking Powder
100ml Full Fat Milk
4 Tbsp Cocoa Powder
50g (or more!) chocolate chips, ( I always add more!)

(Optional 75g melted white chocolate to decorate for the top of the loaf!)

Ok, first pre heat your oven 160, then grease and line a loaf tin with parchment paper!

Second, beat together the butter and sugar and until creamy and much paler in colour, (The more you beat the ingredients the creamier the cake!)

After, crack and mix in the eggs (one at a time!) until fully combined!

Next, add in the flour, baking powder, milk and cocoa powder until fully incorporated! (If you wanted to, you could add 75g of grounded almonds!)

Then add in the chocolate chips and place the mixture into the loaf tin. And bake for 40-50 minutes!

You can check to see if the loaf is done by putting a skewer into the cake, and if it comes out clean, then it is done!

Once done, leave the loaf to cool fully in the tin and then if you wish, decorate the loaf how you want to melted white chocolate!

And then your done, and sit back while you see all of your cake being demolished by anyone who happens to see it!

I hope that you have liked this recipe, as I feel as though it is perfect for any occasion! And is an absolute winner  for any of my fellow chocoholic friends out there!


Follow

Tuesday, 5 July 2016

M&M White Chocolate Cookies


Ok, so recently I have been thinking of different ways to spice up my Tanya Burr White Chocolate Cookies that I do, which can say are amazing! And then one it just came to me that I should create white chocolate cookies, but rather than just have chocolate chips. I should instead use M&M'S! And can I tell you! This was an amazing decision! The white cookies themselves taste absolutely incredible! But adding M&M'S made the cookies one billion times better!

So let's get to the good bit. THE COOKIES!

Makes; between 12- 20 cookies!                                                 Prep Time; 10 minutes!
Difficultly, So Easy!                                                                    Cook Time; 5-8 minutes!

You Will Need;

200g of butter ( I use Margarine!)
300g Caster Sugar
1 Egg
1 tbsp Golden Syrup (Optional, but I have a soft tooth and it makes the cookies much softer and much, much more gooey!)
400g Self Raising Flour
As many M&M'S as you want!

Let's Do This!

First, pre heat your oven to 170. And line a baking tray with parchment paper!

Next, in a mixing bowl weigh out the butter (or margarine!) and sugar and cream together until smooth and ,much paler in colour! (The more you cream, the softer the cookies, and the easier the flour is to mix in!

Then, crack in your egg mix in until thoroughly combined, and then mix in the golden syrup!

After this, add in the flour bit by bit, and then add in  the M&M'S!

Next roll bits of the cookie dough into whatever size you want then to be and then place them onto the baking tray and bake for 5- 8 minutes!

Lastly, when cracks start to appear in the cookies take them out of the oven so that they don't burn. They will continue to cook as they cool down, so don't panic if they still look and feel undone!
Leave them to cool for at least 20 minutes, and then enjoy!

I just love the pop of colour that the M&M'S give through the white of the cookies, and I feel as though they will be perfect for a picnic, or just a day hanging out with your friends!


Follow

Thursday, 9 June 2016

Delicious Chocolate Cake Recipe


If  you know me, then you will know that I' am a HUGE chocoholic! If I could I would eat chocolate for every single meal,but sadly this would very unhealthy and would defiantly make me feel extremely unwell which would not be good!

So anyway, I have been recreating this cake recipe for a couple of years now, and every time I bake it, everyone is always asking me how on Earth did I do it or  if  I' am using t a cake box mixture. Because we all know that the Becky Crocker Cakes are amazing!

But any who, lets get on to the best part of this post, THE CAKE!


Difficulty; So Easy        Prep Time; 10 minutes
                                      Cook Time; 14- 16 minutes


Let's Do This;

You Will Need;

175g Butter at room temperature, (I use Margarine!)
175g Caster Sugar
3 Eggs
1 tsp Vanilla Extract
150g Self- Raising Flour
1 tsp Baking Powder
50g Cocoa Powder

For the Butter Cream Icing;

50g Butter at room temperature (I again used Margarine!)
200g Icing Sugar
1tsp Vanilla Extract
50g Cocoa Powder (You can add more if you want it much more chocolaty!)

Method;

1)Pre heat your oven to 180 ° . And line two round cake tines with parchment paper. And then in a mixing bowl cream together the butter and sugar. Cream it well so that the cake becomes really, really soft.

2) Next, ad in the three eggs one at a time. At first, the mixture may seem weird when all of the eggs are all mixed in, but trust me once the flour has been added the mixture will look normal again!

3) Add in the vanilla extract.

5) Stir in gently the sifted flour until it has been fully incorporated. Once the flour has been mixed in add and combine the baking powder into the mixture.

6) Add in the sifted cocoa powder and mix until fully combined.

7) Spread the mixture equally into the two really lined cake tines and then place then into the oven for 14-16 minutes.

8) Once the cakes have cooled completely, carefully take the two cakes out of the tins and place them onto two cooling racks.

9) Next for the icing, cream the butter so that it is super, super soft and stir in the icing sugar bit by bit (so it doesn't go everywhere in a big cloud of dust, like it did to me once!) until it has been fully incorporated.

10) Stir in the sifted cocoa powder. And then you are ready to ice your cake! 

Note; Make sure that your cake is completely cool as if you ice the cake while it is still warm, all of the icing will melt off, and your cake will be ruined!


And that it, you cake is complete, and now ready to amaze all your friends and family with your fabulous creation!

This cake is suitable for any creation. I have made this beauty for people birthday's and every time, who ever I bake it for they are always impressed!

This cake would also be amazing for a picnic, or a get together with friends!

ENJOY!


Follow

Sunday, 22 May 2016

Cookielicious


So, the other day I was in the mood for baking (like I' am everyday!) and thought that I would recreate the Tanya Burr chocolate cookie recipe like I have already done at least hundred times!

As someone who bakes at least four times a week, I have to make sure that I always include these cookies as  they are amazing and  get absolutely demolished within the first 20 minutes of them being ready!

Furthermore, since I have baked these cookies lots and lots of times before, I have discovered different ways of making them absolutely amazing every time without the worry of if they are going to turn out wrong!

So let's get onto the best part, THE COOKIES!

Let's do it!

Difficulty: So easy
Prep Time; 10 minutes
Cooking Time; 6- 7 minutes

You Will Need;

200g Butter (I use margarine!)
300g Caster Sugar
1 Egg
1 Tbsp Golden Syrup (This is optional but this makes the cookies much softer and much more gooey!)
275g Self- Raising Flour
75g Cocoa Powder
Whatever chocolate you want to add. As I like my to make cookies smaller in order to get more out of each mixture, I like use to chocolate chips instead

Method;

1) Pre heat your oven to 180 (I put my oven on 180 rather than 200 so that they are softer and have less chance of burning) and line your a baking tray with parchment paper.

2) Mix the butter and sugar together in a mixing so that it is soft, creamy and much paler in colour. If your butter/ margarine has just come out of the fridge then you can heat it up (once it's been measured in the mixing bowl) in the microwave for ten seconds on it's lowest heat setting!

2) Crack in your egg and combine until it has been fully incorporated. And then add in the golden syrup!

3) Next, stir in the flour bit by bit until it it fully combined, and then mix in the cocoa powder.

4) Lastly, add in the chocolate chips, or whatever chocolate you like. And then pick up bits of the mixture and roll them into a ball. Once on the baking tray squish each cookie dough ball down slightly and then place into the oven.

Tip; Only put four cookies on each tray ( at the most!) as they will spread and you will end up with one giant cookie!


Also, I recently posted a blog post on my top two favourite bakes which featured my recreation on the white chocolate cookies that can be seen above, so feel free to have a look at it here!

Follow

Sunday, 15 May 2016

Easy Flapjacks


When it comes to cooking there is always something that my family requests for me to bake, and that is flapjacks. Not only do these taste delicious but they also go well with every occasion either that being around with friends, or just having an outing and you feel like you would just like to take something with you that will give you extra energy, or if you are feeling a little bit peckish.

And all I can say is that these flapjacks are absolutely amazing. They are so lovely and gooey that they just fall apart when you hold them. (So, just make sure you are using a plate when you eat these.)

One thing that  I would like to say about this recipe is that it isn't mine. I feel as though a flapjack has to be perfect, and since I'm not a baking wizard, I just like to do it for fun. I feel as though this recipe is the best way to get the most amazing flapjacks that you know everybody will love. (And trust me they will!)
So, the recipe I'm using is from the book, 'Step-By-Step Baking' by Caroline Bretherton.

Anyway, so let's get onto the recipe;

Makes; 16-20 squares, it d epends how you cut them!
Prep Time; 15 minutes
Cook Time; 40 minutes


You Will Need;
225g butter - (I use margarine)
225g light soft brown sugar
2 tbsp golden syrup
350g rolled oats

1) Preheat the the oven to 150, and lightly grease a 25cm (10 inch) cake tin with butter and cover with baking parchment.

2) Put the butter, sugar and golden syrup in a large saucepan and place over a low heat. Make sure the heat is low and you stir the mixture constantly so you don't burn the any of the ingredients to the pan.

3) Remove the pan of the heat, and stir in the oats being careful not to over mix.

4) Spoon the mixture into the cake tin and press firmly down with a metal spoon to make a even layer.

5) Bake the flapjack for 40 minutes or until it's golden brown. Because of my tin my flapjack only took 30 minutes.

6) Leave to cool for ten minutes and then either cut the mixture in 16 squares, or 20 rectangles.


After baking these so many times, and hearing such good feedback from them I think that they are one of my most favourites things to bake!

If you would like to see what my other favourite bakes are you can click here.


Follow

Thursday, 12 May 2016

My Top Two Favourite Bakes


When it comes to baking there are so many recipes that I just love to try or even create. I find doing this makes me feel happy and extremely relaxed. I just love to bake, and I love seeing all of the different recipes that are out there in the world, and I just love seeing how happy everyone is when they taste all of the creations I have made!

One of these recipes that I feature below have already been featured in a previous blog post. I will link the post below within each recipe so that you will be able to find it much easier to follow.

So, lets get onto the exiting bit. The food!


The first thing that I love to bake is my Homemade Chocolate Brownies! Like I said above I have already done a blog post on this so I will leave a link for you above (as you can see) so you can read it. Anyway, I love baking these chocolate brownies are they are so delicious and they are perfect for either an gathering with friends, or if you just feel like having a cozy day were all you want to do is just relax! And because these brownies are so gooey and so soft, they go so well with a big cup of tea (or a glass of milk!) and a sit down watching T.V. or YouTube in my case!
Lastly, these brownies are so easy and quick to make, so you can always assure that they will be perfect! And if you are anything like me, you will be lucky if they last any longer than ten minutes!


Lastly, the last two things that I love to bake are actually a recipe from Tanya Burr. They are the, 'White Chocolate Cookies' and the, 'Plain Chocolate Cookies' or as describe on her blog post I believe that they are called, 'The Best Chocolate Cookies Ever!' However, because of how much I love to bake, I have sort of adapted the recipe of the white chocolate cookies.

Prep Time; 10 minutes
Oven Time; 6-7 minutes baking time, However, it depends on the size of the cookies. I do mine quick small!


So, You Will Need;                                      

200g Butter (I use margarine)
300g Caster Sugar
1 Egg
1 1/2 tablespoons of golden syrup
375g Self Raising Flour
At least four handfuls of chocolate chips, But you can use what ever chocolate you like.

1) Pre- heat your oven to 150 and line a baking tray with parchment paper. Yes, I know this seem quite low for an oven, but I promise because the cookies are plain white and not chocolate, they are more likely to burn. But again it depends on the size of your cookies, if you want them to be a bit bigger than mine turn the oven up to 180, but no higher!

2) Cream together the butter/ margarine and the sugar. If your butter is quick solid pop it into the microwave for 10 seconds on the lowest heat setting so it softens. (If still quite firm do another 10 seconds and then start creaming!) You want to make sure the mixture is extremely soft and it goes paler in colour.

3) Crack in your egg and mix it into the mixture.

4) Add in the golden syrup, and stir.

5) Once the golden syrup has been mixed in, mix in the self raising flour bit by bit in order to avoid mess. (However, even by doing this I still make a big mess whoops!)

6) Add in the chocolate chips, or whatever chocolate that your heart desires!

7) Roll sections of the mixture into round ball shapes. You can make them however how big or small you want them to be!

8) Place the balls of cookie dough on the baking tray (I would do no more than four at a time, as they spread a lot during their cooking time!) Squish them down a tiny bit, and then place into the oven. If you want soft, gooey cookies like how you get them in, 'Millies Cookies' then do them for no longer than 6-7 minutes minutes. Or until they just start to crack at the top. Again, it depends on the size of your cookies!

And remember; when you get the cookies out of the oven they will feel as though they are not done. The cookies are still cooking inside while they are cooling down, you will have to leave them for at least ten minutes before you can eat them as they will, just fall apart in your hands!

However, after ten minutes you can always transfer them to a cooling rack!

These cookies are perfect for a rainy day or again having a gathering with friends!


What are your favourite recipes?


Follow

Saturday, 23 April 2016

Soft, Gooey Easy Homemade Brownies


Recently, since my trip to a local bakery in Hellingly I have been craving brownies. The brownies that I witnessed in the bakery looked so soft and so beautiful that I just wanted to eat every single one of them ( which I almost did!) So since then, I have managed to create my own recipe for the best chocolate chip brownies that you will ever taste. Not only do the brownies taste amazing, but they also look the part. They are what a brownie should look like. A brownie should draw you in and make you want to eat the whole batch without even noticing. (Not at all have I've ever done this before!)


So for this recipe all you will need are a few simple ingredients;

You Will Need;

150g Melted Butter
250g Caster Sugar
1 tsp Vanilla Extract
100g Cocoa Powder
2 Eggs
A Pinch of Salt
65g Self- Raising Flour
1/4 tsp Baking Powder (This will help make the brownies softer, and will help them to semi rise)
Whatever chocolate you like. You could use big chunks of chocolate, or use white and dark chocolate chips like I did! 
Some icing sugar to dust the brownies 

1) Preheat your oven to 180 °. Then grease and line with parchment paper a 26 cm x 19 cm tin.
2) Melt the butter over the hob, or in a microwave until fully melted. (Make sure the heat is low, as it will burn the butter) 
3) Place the butter into a mixing bowl and stir in all the caster sugar.
4) Add in the vanilla extract, and the cocoa powder.
Once all incorporated, add in one egg at a time until fully mixed.
(Don't over mix the mixture as the brownie will lose all of it's gooeyness.)
5) Add in all of the dry ingredients separately (Flour, then the baking powder)
6) Lastly, add in whatever chocolate you like (I added in lots and lots of chocolate chips!)
7) Place the brownies in the oven for 15 minutes or until shiny on top. 
8) Dust your brownies with icing sugar, and present them in any way you want. 
(Hint; Ice cream or even whipped cream will work perfectly with these brownies!)


These brownies will be amazing as just a snack, or as the ideal treat for a get together with friends.


Follow

Monday, 18 April 2016

My Low Fat Banana And Blueberry Loaf


Well hello there and welcome to the re launch of my blog. I decided that I would start fresh as I have grown wise (well no really!) and realized that my previous blog wasn't at it's best. So I decided to scrap the old one and bring in something new that I know that you will all love. So in today's post I'm going to be sharing with you my low fat banana and blueberry loaf that I have made specially for if you need something or if you feel like being creative. Anyway, lets get into it!

I find that making (and eating) this recipe makes me feel happy and amazed at myself. Not only is this loaf tasty, but it is also low fat so you will not feel guilty about having it. Furthermore, please note, even though the recipe (and title) says that the loaf contains bananas and blueberry's don't feel as though you need to add the blueberry's in. I myself use to dislike blueberry's but since I started to get myself to find new recipes I have suddenly discovered that I now love them!  


The recipe below is for one loaf.

What You Will Need;
  • 1x Wooden Spoon
  • 1x Large Mixing Bowl
  • 1x Set Of Scales
  • 1x Set Of Measuring Spoons
  • 1x Fork (just to mash up the banana)
  • 1x Bowl Or Plate (to mash the bananas up in)

Ingredients;
  • 200g Self- Raising Flour
  • 140g Caster Sugar ( you can also use Canderel if you wish)
  • 1 1/4 teaspoon Baking Powder (this will make the cake softer)
  • 1/2 teaspoon Ground Cinnamon
  • 2 Egg Whites (having no yolks will lower the fat content)
  • 3 Bananas (Mashed)
  • 1 Tablespoon Of Golden Syrup for extra sweetness (this is optional)
  • 1 Massive handful of Blueberry's (or as much as you want)
Or instead of blueberry's you could add apple puree/ apple sauce, or a few handfuls of chocolate chips for extra sweetness!

Method;

  1.  Preheat your oven to 180°.
  2. Grease and line your loaf tin. Your loaf tin will need to be 20x10cm (8x4in.) 
  3.  In a large bowl combine the self raising flour, sugar, baking powder and the ground cinnamon.
  4. Add in the mashed banana and egg whites and combine.
  5. Next, when all the ,mixture has been mixed well together add as many blueberry's as you wish. (I added in one handful then stirred and then added another handful.) Again, this bit is optional, but feel free to add as much in as you like. 
  6. When everything has been mixed in place the mixture into a loaf tin and place in the oven for about 50 minutes.
Tip: When cooking the loaf if you find that the outside has cooked but the inside hasn't, turn down the temperature of the oven, this will allow the inside of the loaf to cook without burning the outside.


I think that this recipe would be perfect just for a snack, or for having a gather with friends with a big pot of tea!


I hope that you have enjoyed this creation, and will see you in my next post!


Follow